Guide to setting up your coding environment and How To Run A Test Server
GitHub
If you don't have a GitHub account, start by making one.
Then, you go to the repository on GitHub, which can be found here: https://github.com/Skyrat-SS13/Skyrat-tg
You should see the buttons displayed in the following image on the top-right-corner, you want to click on the one that says "Fork".
Once you've done that, it should take you to your own fork of the repository. That means it's your semi-independent version of our codebase, on which you're free to do whatever you want. You should find it at https://github.com/yourgithubusername/Skyrat-tg, like this: https://github.com/GoldenAlpharex/Skyrat-tg
VSC and GitHub setup
Now, what you want to do is two things: Download Visual Studio Code (VSC) and GitHub Desktop (you could use something else, but that's the easiest to work with when you're new). When setting up Visual Studio Code, I highly suggest you check the option that makes it so you can open folders in VSC from the options that pop up when your right-click on a folder in the file explorer, it'll make your life easier. Links for VSC and GitHub Desktop:
https://code.visualstudio.com/
https://desktop.github.com/
Then, once you've downloaded both, you want to go to the page of your fork that I mentioned earlier (https://github.com/yourusername/Skyrat-tg)
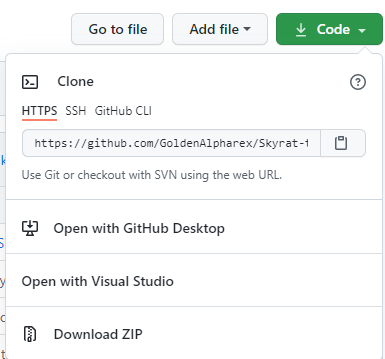
You want to find this big green button on the main page, and then click on it, and then click "Open with GitHub Desktop"
It should open your GitHub Desktop and basically ask you to identify yourself if it's the first time you're opening the application, and then it will ask you for details for where you want the folder to be, just set yourself a folder for all of your GitHub repositories somewhere and then just click "Clone" whenever you're satisfied with everything. Then, it's a waiting game, waiting for the cloning to be done.
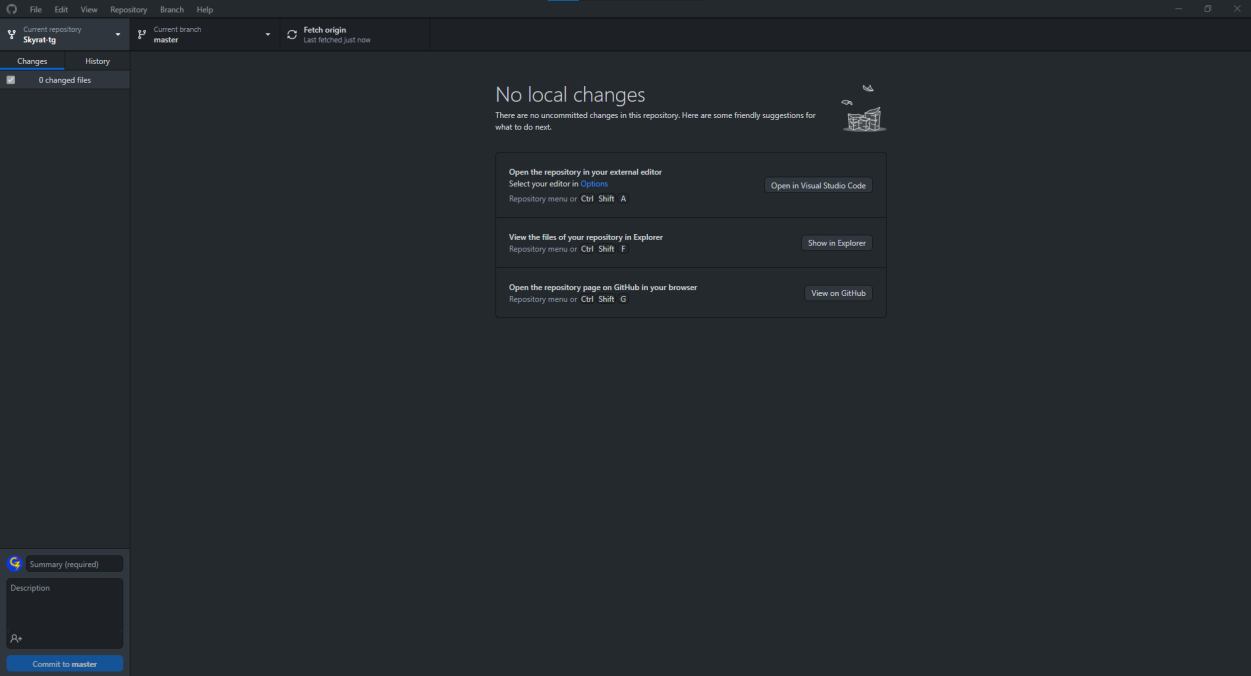
Once it's done cloning, it should look like this:
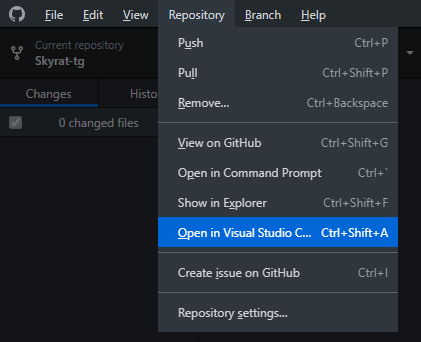
You'll want to click on Repository > Open in Visual Studio Code, like this:
It will bring you to Visual Studio Code. In the bottom-right corner, it will suggest you some extensions to download. You need to download at least the two BYOND-related extensions it suggests (DreamMaker Language Client and BYOND DM Language Support), which also have the benefit of making your life a whole ton easier. You need to restart VSC to get the extensions to work.
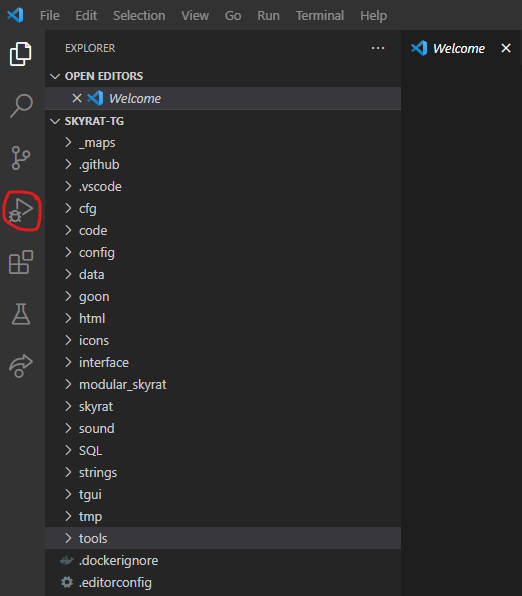
Once you're done, you should be able to see this on the right of your editor (with less buttons because I have more extensions). You want to click on the one that's circled.
You will get to this page, on the right still, you go to the top of it and click on the downward arrow and select "Launch DreamDaemon" (so you don't run out of memory during your testing, because yes that's a problem now)
Then, go at the bottom and untick the "Runtime errors" breakpoints (CAUTION: IF YOU'RE CODING, TURN THIS BACK ON, THIS IS JUST TO MAKE IT EASIER WHEN YOU'RE NOT CODING AND WANT TO HOST A SERVER QUICK 'N EASY FROM A WORKING CODEBASE!)
Server setup
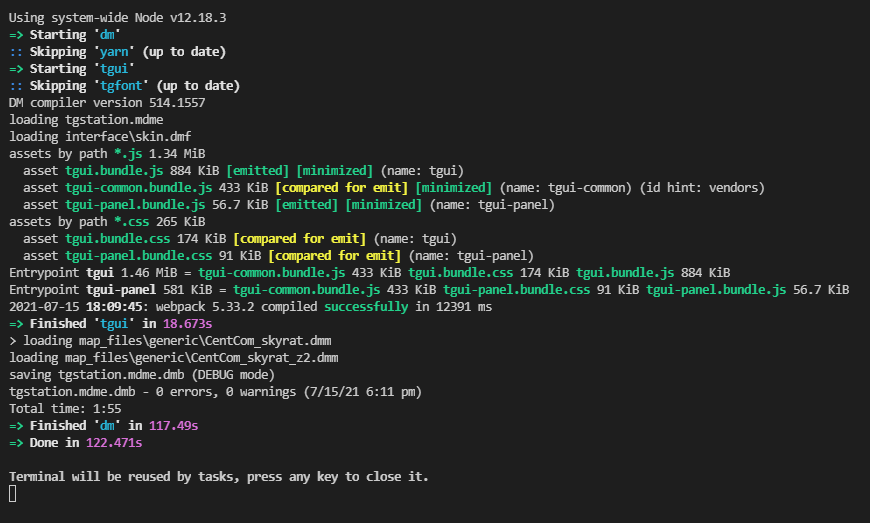
Now, you're ready to start your test server! Simply hit F5 and let everything compile! If there's compile errors that are not DM-related, it's likely because you're missing some things that you have to download and it should usually tell you what you need to install. The end result should look roughly like this:
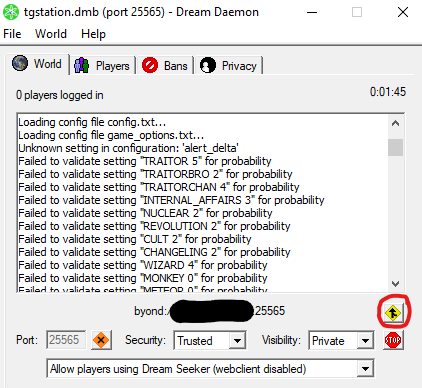
Now, it should open Dream Daemon, if it doesn't pop up, go to your taskbar's "Show Hidden Icons" button and right-click the green BYOND icon, then click "Open Dream Daemon".
You should see this, the IP I blacked out would be your IP, and you can se the port if you want this to be actually public. However, I recommend setting the visibility to "Private" just so you don't have someone random joining your server.
To join your own server, you can click on the button that's circled in red in the following picture:
It should now have opened your very own private server, on which you have full Host powers without any setting up required.
Enjoy!

